Setup Git repository
Overview
Teaching: 1 min
Exercises: 1 minQuestions
What do I need to think about when creating a new repository on GitHub?
Objectives
Know how to setup a GitHub repository according to IDS standards.
Understand which license to add to your repository.
Understand the benifits of templates and how they differ from forking/cloning.
Understand how to allow the different levels of access to your repository.
Introduction
Setting up a GIT repository should always be the first step for any software related project. For the many advantages of using GIT check here. While there are many options for hosting your repository, the default choice at IDS is GitHub. Some of the advantages of using GitHub are features like free processing power, free artifact hosting, a large community and having all IDS repositories searchable under the same organisation. When first setting up a GitHub repository, there are a number of things to consider:
- Is there a template I can use to save time setting everything up?
- Who will have permissions to read/write/administrate this repository?
- What license does the repository require?
- Do I have SSH keys configured?
GitHub templates
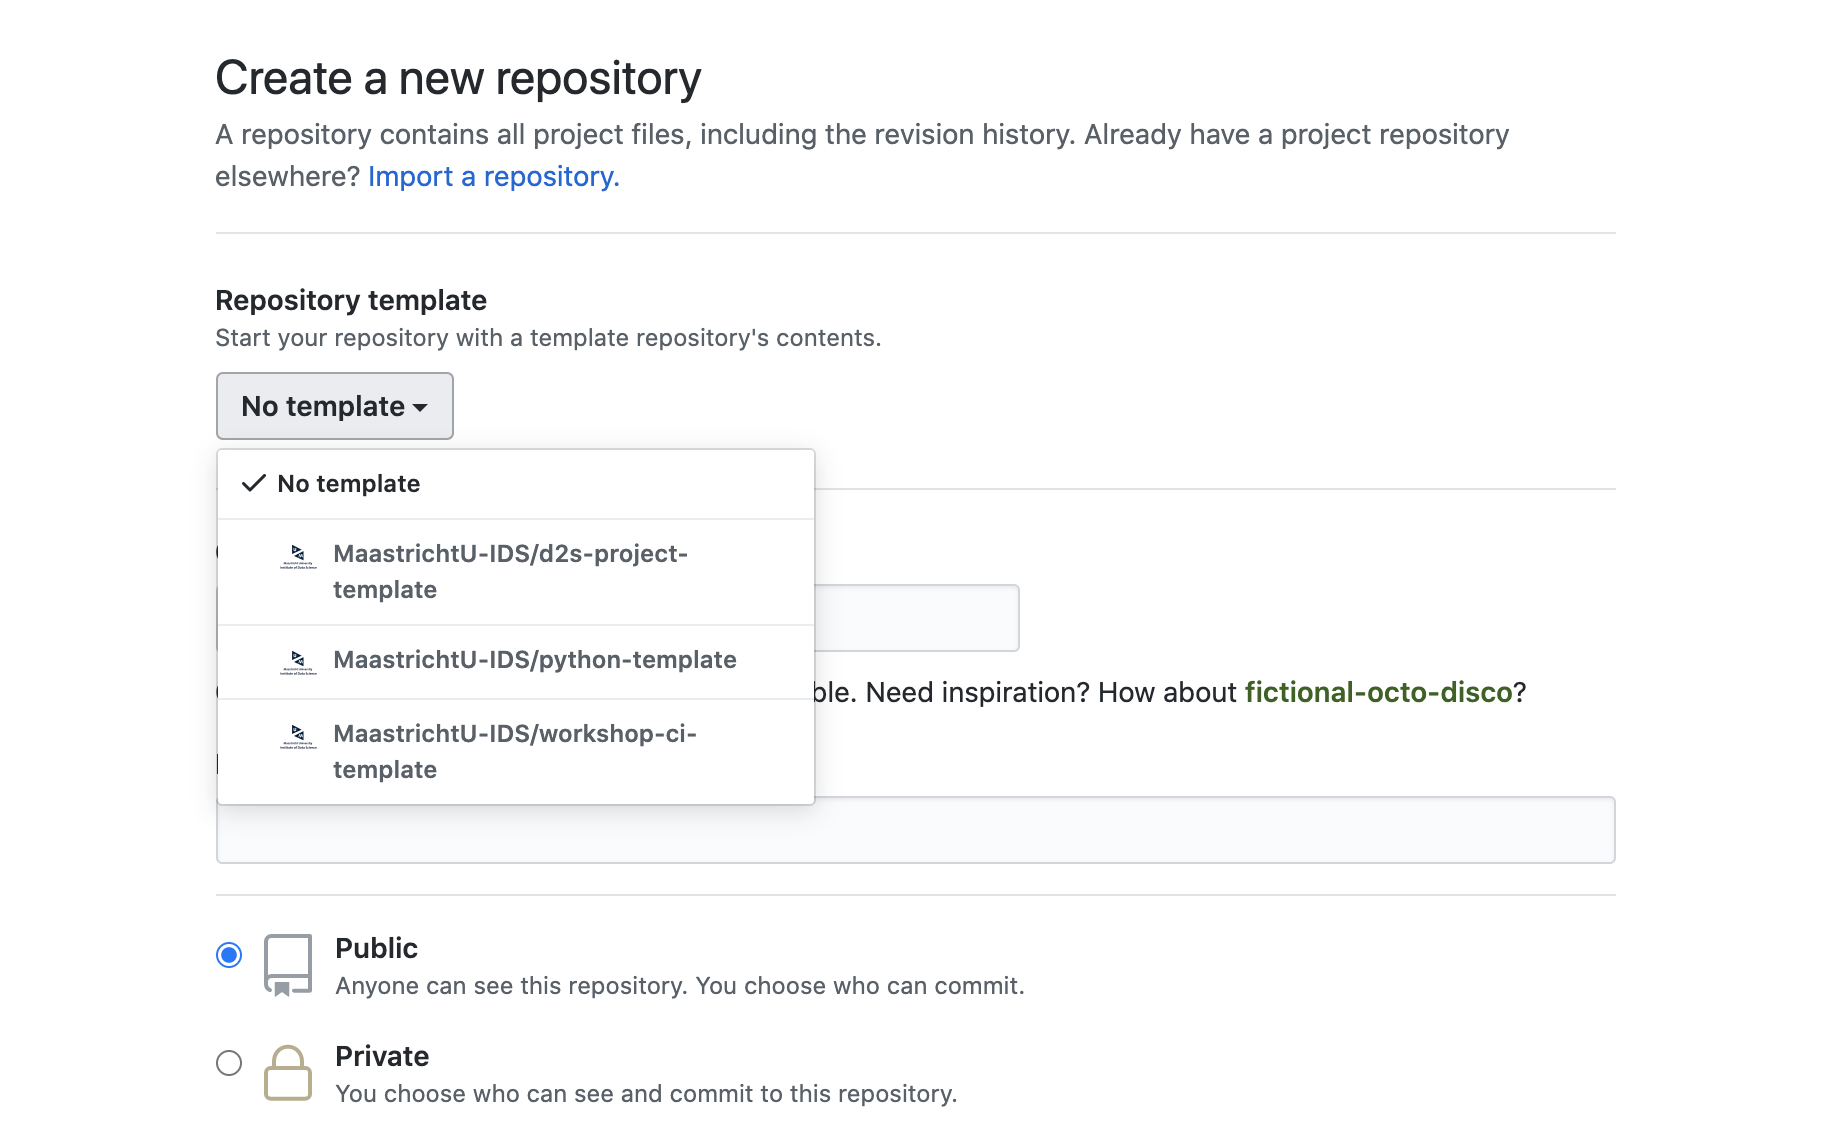
GitHub templates are a quick way to start your application with the scaffolding already in place. This can save a lot of time as you don’t have to worry about setting everything up. This could also be achieved by forking a repository. However forking is meant more for collaborating on the original repository. In the case of using a template you will not include the entire commit history of the original project for example. It’s a fresh start as if you had simply copy pasted the code into a fresh repository. At IDS we are developing a number of templates ready to use for Python, Java and React websites.
Note that there are many generic solutions to ‘scaffold’ your application when starting a new project. For Python, https://github.com/cookiecutter/cookiecutter is a popular solution.
Create a repository from template
- In GitHub, Use the + icon to create a new repository.
- Choose the MaastrichtU-IDS/workshop-ci-template from the repository template dropdown.
- Select MaastrichtU-IDS as the owner of the repository.
- Add a name and description to your repository and set the access to private.
Repository permissions
GitHub differentiates between 5 different types of access:
- Read - for users who only need to view or discuss the code.
- Triage - Allows users to do minor administrative tasks such as modifying issues and requesting reviews.
- Write - Allows users to push code to the repository and setup GitHub actions.
- Maintain - Allows users to do more potentially destructive things such as pushing to protected branches.
- Admin - Allows users to do anything, such as deleting or transferring the repository.
Check here for a detailed overview. In almost all cases, using the read or write permissions will suffice and should be considered first. To save time, GitHub allows organizations to create teams of usersfor which permissions can be handled in one go.
Configure repository permissions
- Under settings for your repository, go to Manage access.
- Click Invite teams or people.
- Add the MaastrichtU-IDS/developers team and provide them with Write access.
- Add the MaastrichtU-IDS/admins team and provide them with Admin access.
Adding a license
Adding a license is mandatory as no one is allowed to legally use your code if no license is included.
It is therefore customary to add a LICENSE or LICENSE.txt file to the root of your repository. There are many different existing licenses that can be reused. Unless you are a lawyer, you should never write your own license. Check https://choosealicense.com to see which license fits your project best.
Of course this decision should be made together with all collaborators if the project spans multiple institutions.
As a default at IDS we advise using the MIT license 📜, which allows anyone to use the code in any way they see fit (even selling it or making their version closed source), but also makes clear you are not responsible for any damages that may be incurred by using the code.
Configure repository permissions
- Choose a license at https://choosealicense.com
- Add the license to your repository root as LICENSE
Solution
Apart from the MIT license, other popular Open Sources licenses includes:
- Apache 2: similar to the MIT license, but more detailed, it requires to list changes made to the original software, and introduce restrictions related to trademark use. You might want to consider this license for bigger and more structured projects.
- GNU GPL v3: a “copyleft” license, it includes restrictions about which license you should use when using a GPL licensed code. Typically, a GPL licensed project requires other projects using their code to be open source.
Using SSH
SSH keys provide an easy way to access your GitHub repositories without having supplying your username and password every time. This is done by generating a keypair, publishing the public key on GitHub and storing the private key locally on your machine.
Clone repository using SSH
- Follow the instructions to generate a keypair for your operating system.
- Follow the instructions to upload the public key to GitHub.
- In your repository, click Clone or Download and make sure Clone with SSH is selected.
- Copy the url to your clipboard and in a terminal perform
git clone URLin the path of your choice. The name will be set to the repository name by default.
Key Points
When creating a GitHub repository keep permissions in mind.
Templates are a quick way to scaffold your application.
Don’t create your own license.
